Build a meal plan that fits your client: pick the meals, add foods from the database, set daily goals, and give your client options to choose from.
Start a Plan from Scratch
- Go to Clients, open a client, and click the Meal Plan tab.
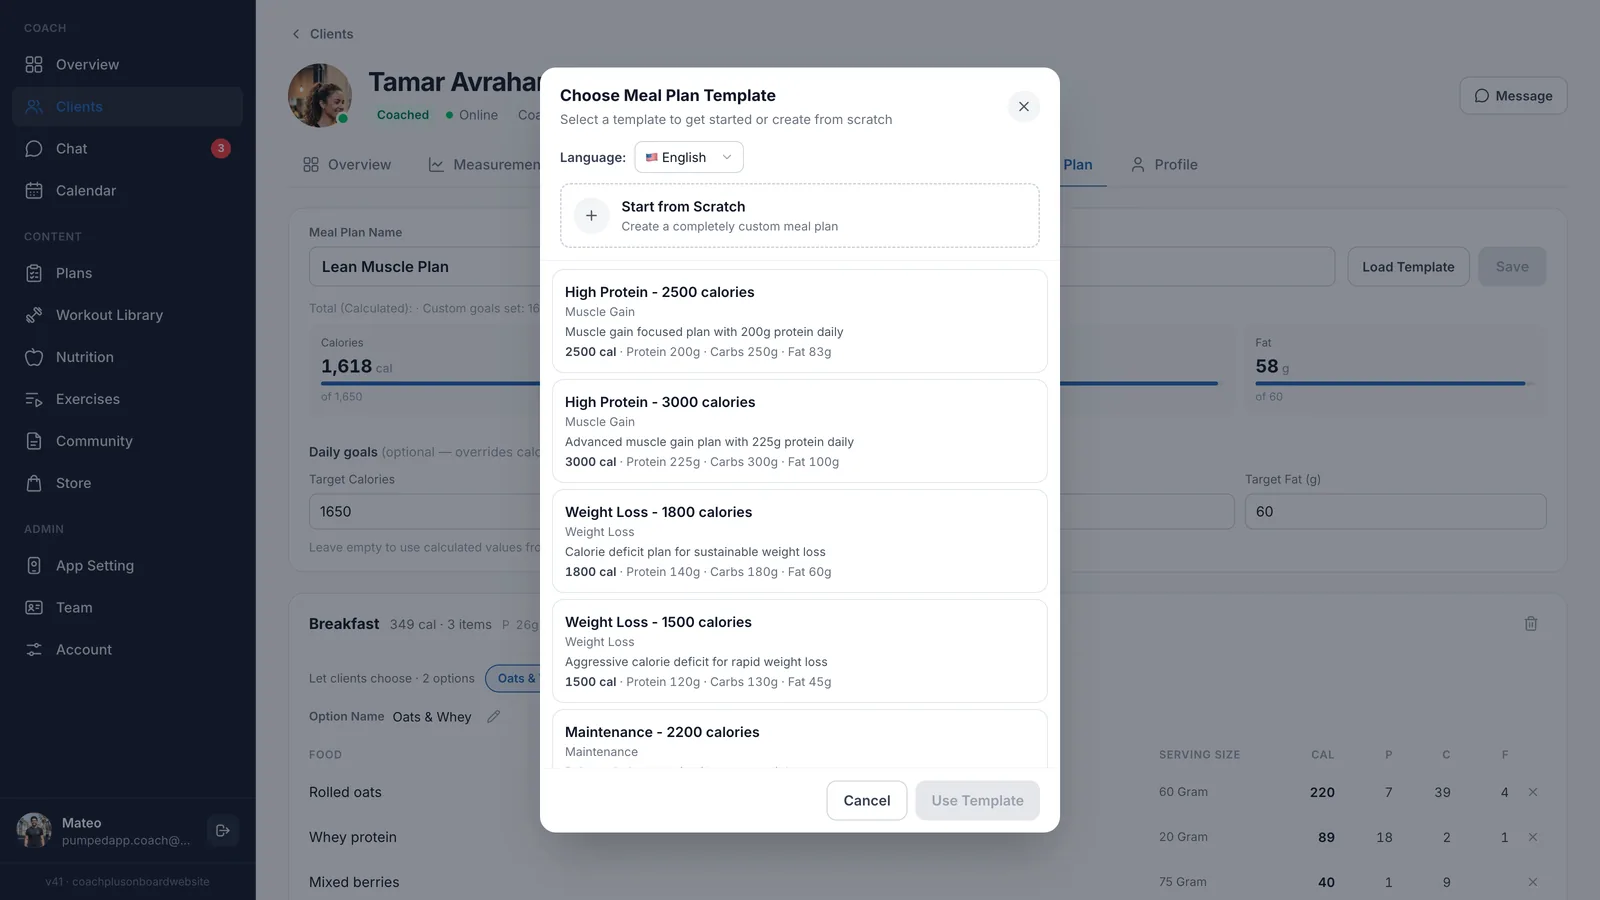
- Click Start from Scratch. (It's also in the template window.)
- The editor opens with five empty meals: Breakfast, Snack, Lunch, Snack, and Dinner. The plan is named after your client - change it in Meal Plan Name if you like.
- Add foods to each meal, then click Save.
Info
The Editor at a Glance
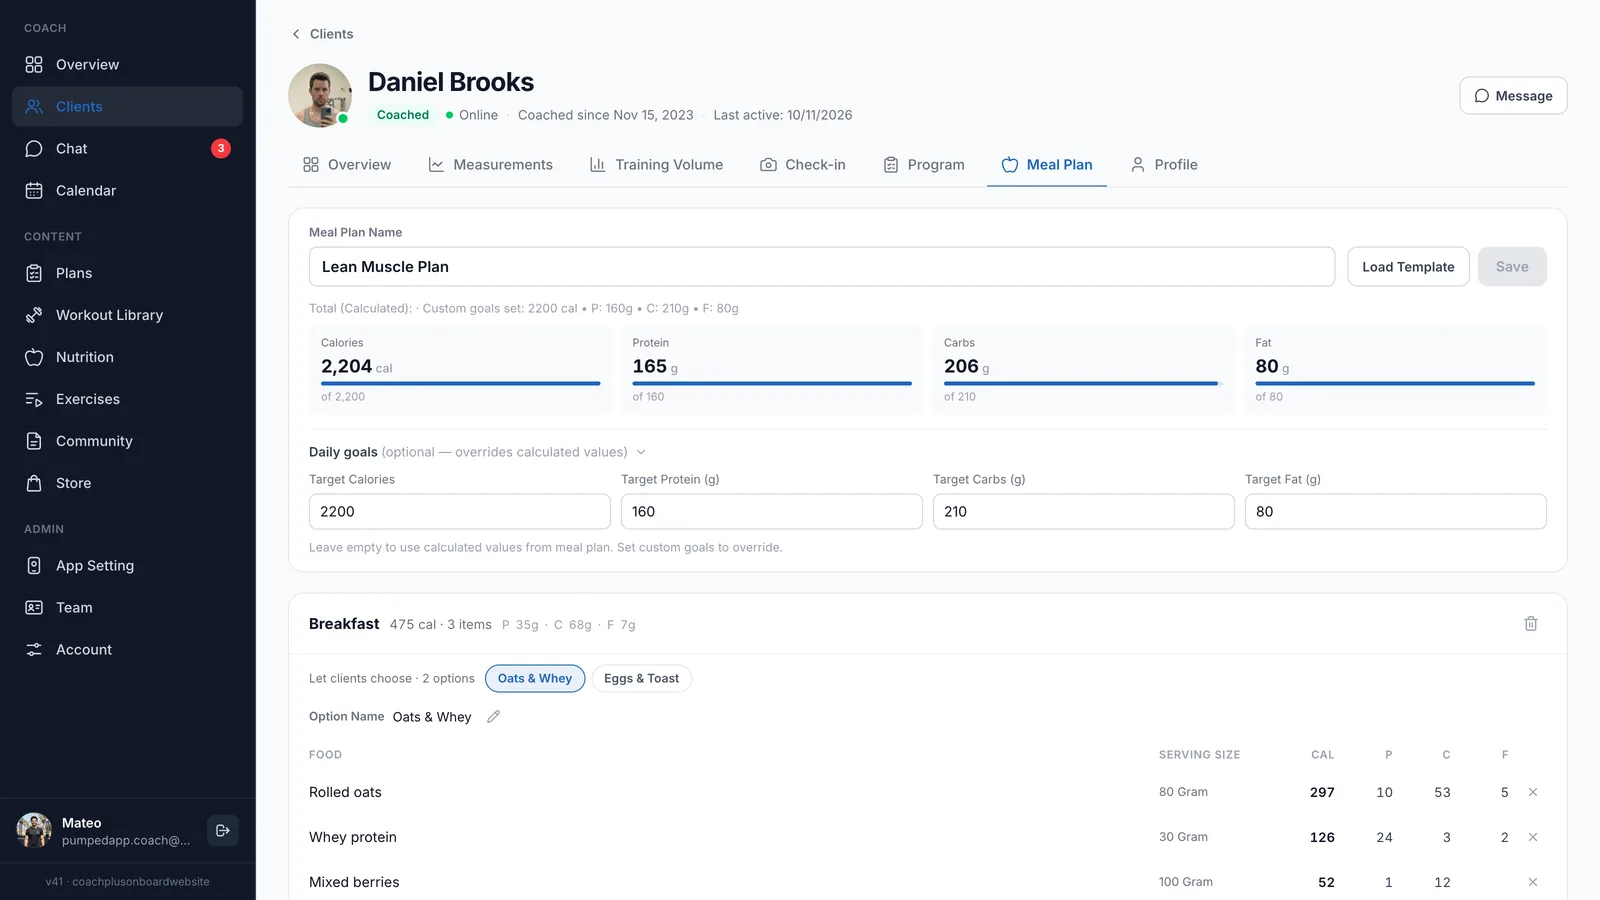
- Top card - the plan name, Load Template, Save, the daily totals, and Daily goals.
- Meal cards - one card per meal, showing its foods, calories, number of items, and protein, carbs, and fat.
- Add Meal - the button below the last meal.
Add and Remove Meals
- Click Add Meal at the bottom of the plan.
- Choose a meal type: Breakfast, Lunch, Dinner, or Snack.
- Click Add Meal. The new meal is added at the bottom.
You can add the same type more than once - for example, three snacks.
To remove a meal, click the trash icon on its card. If the meal has foods in it, you'll be asked to confirm. Empty meals are removed right away.
Add Foods
- Click Add Food Item in a meal.
- Search by name, or tap a category to narrow the list.
- Click a food. It's added to the meal at its default serving, which is shown under the food's name.
The window closes after each food. Click Add Food Item again to add the next one.
The Food Database
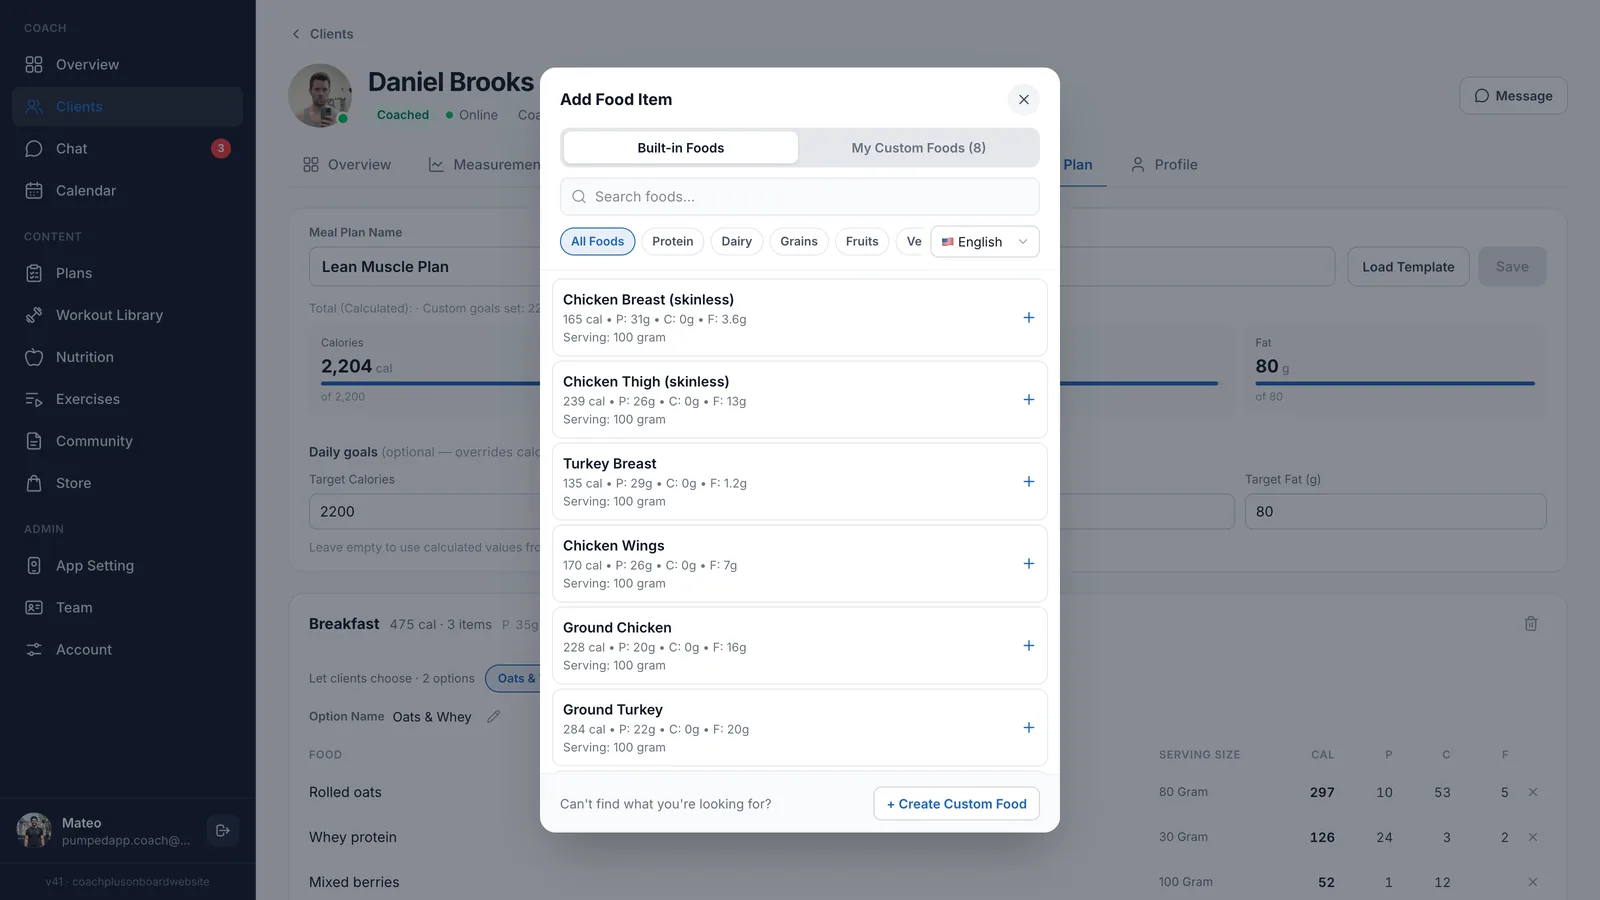
The Built-in Foods tab has 500 foods. Each one shows its calories, protein, carbs, fat, and serving size.
- Languages - use the language menu to show food names in English, Español, עברית, or العربية. Search matches names in the language you picked.
- Categories - All Foods, Protein, Dairy, Grains, Fruits, Vegetables, Legumes, Nuts & Seeds, Seeds, Oils, Snacks, Condiments, and Beverages.
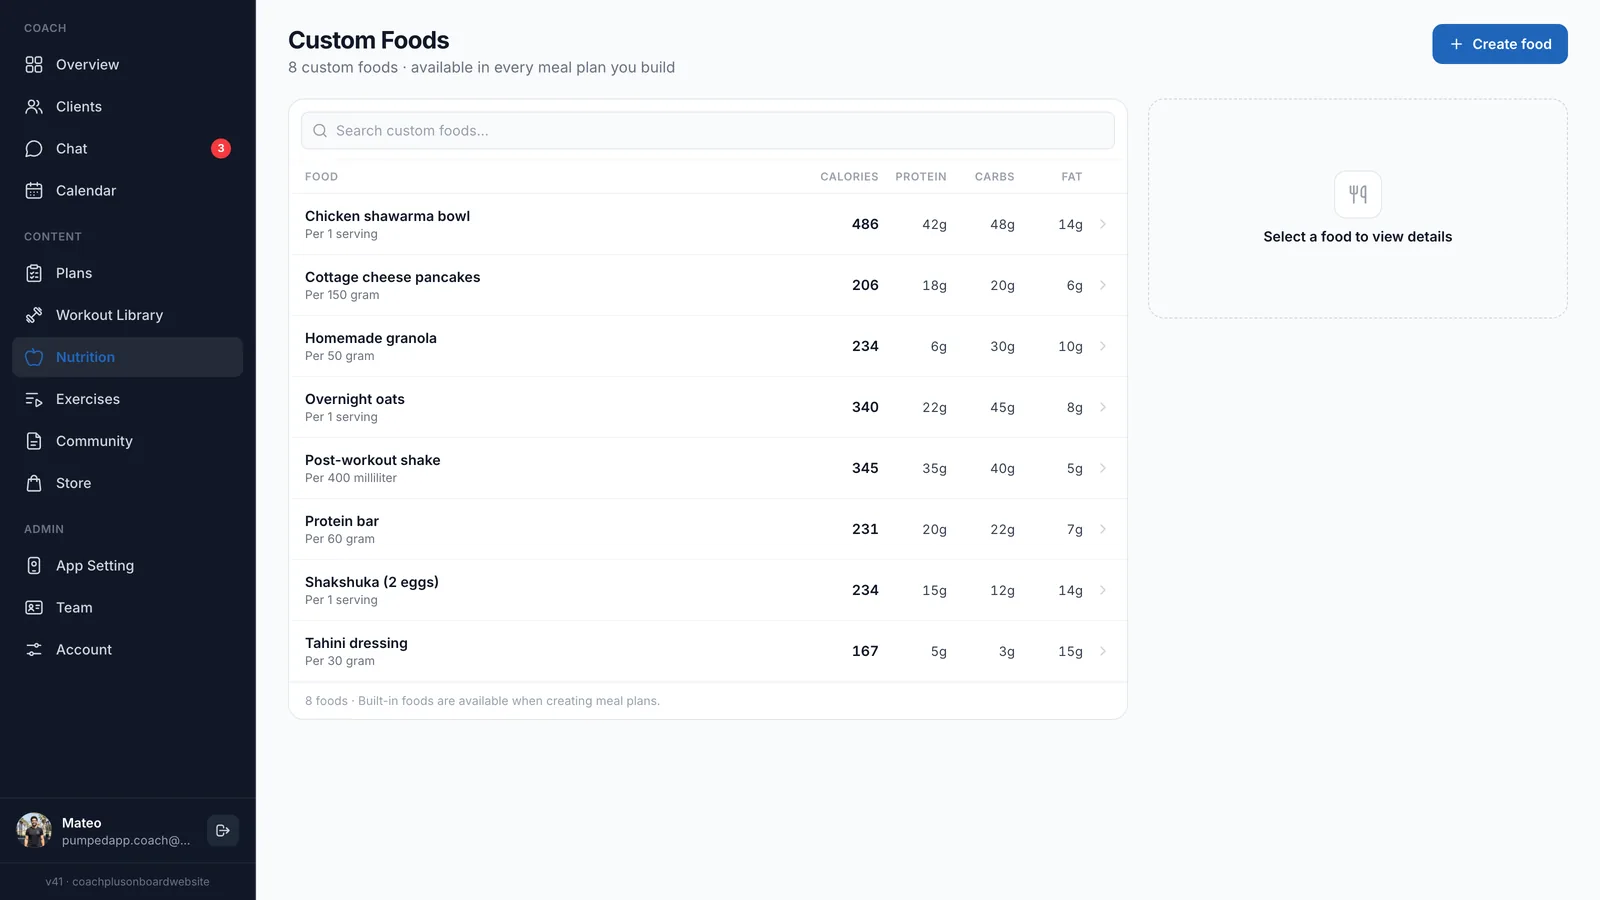
The My Custom Foods tab lists the foods you saved yourself. The number next to the tab shows how many you have.
Can't Find a Food?
You have two ways to add a food that isn't in the database:
- For this meal only: click + Create Custom Food at the bottom of the food window. Enter the Food Name, the Serving Size (amount and unit), and the protein, carbs, and fat per serving. Calories are calculated for you. Click Add Food Item. This food is added to the meal but isn't saved to your custom foods.
- To reuse it in any plan: click Nutrition in the sidebar to open Custom Foods, then click Create food. Foods you save there show up in the My Custom Foods tab of every plan.
Units for custom foods are Serving, Gram, Ounce, Cup, Tablespoon, and Teaspoon.
Change Amounts
- Click a food in a meal. The Edit Food Item window opens.
- Type a new amount in Serving Size.
- Click Update Food Item.
Only the amount can change. The name, unit, and macros are locked - protein, carbs, and fat scale with the amount. To remove a food, click the X on its row.
Daily Totals
The top of the plan shows the day's total Calories, Protein, Carbs, and Fat (in grams). They update as you edit. Calories are based on 4 cal per gram of protein and carbs and 9 cal per gram of fat.
Info
Daily Goals (Optional)
By default, the plan's targets are the calculated totals. To set your own:
- Click Daily goals to open the section.
- Fill in any of Target Calories, Target Protein (g), Target Carbs (g), and Target Fat (g). Leave a field empty to use the calculated value.
- Click Save.
Once a goal is set, its total shows a progress bar and "of [goal]" under it. The bar is your brand color when you're within 10% of the goal, amber when you're more than 10% under, and red when you're more than 10% over.
Warning
Meal Options
Options let your client choose between different versions of the same meal - for example, two breakfasts.
- Click Add Meal Option on a meal. An empty option is added (Option B, Option C, and so on).
- Buttons for each option appear on the card, next to Let clients choose. Click one to view and edit that option.
- Add foods to the new option.
- To rename an option, click the pencil next to Option Name, type a name (like "High protein"), and click Save.
Each option has its own foods and notes. The trash icon deletes the option you're viewing.
Coach Notes
Click + Add Coach Notes on a meal, type your note (for example, "Eat 1-2 hours before training"), and click Save. To change it later, click the pencil next to the note.
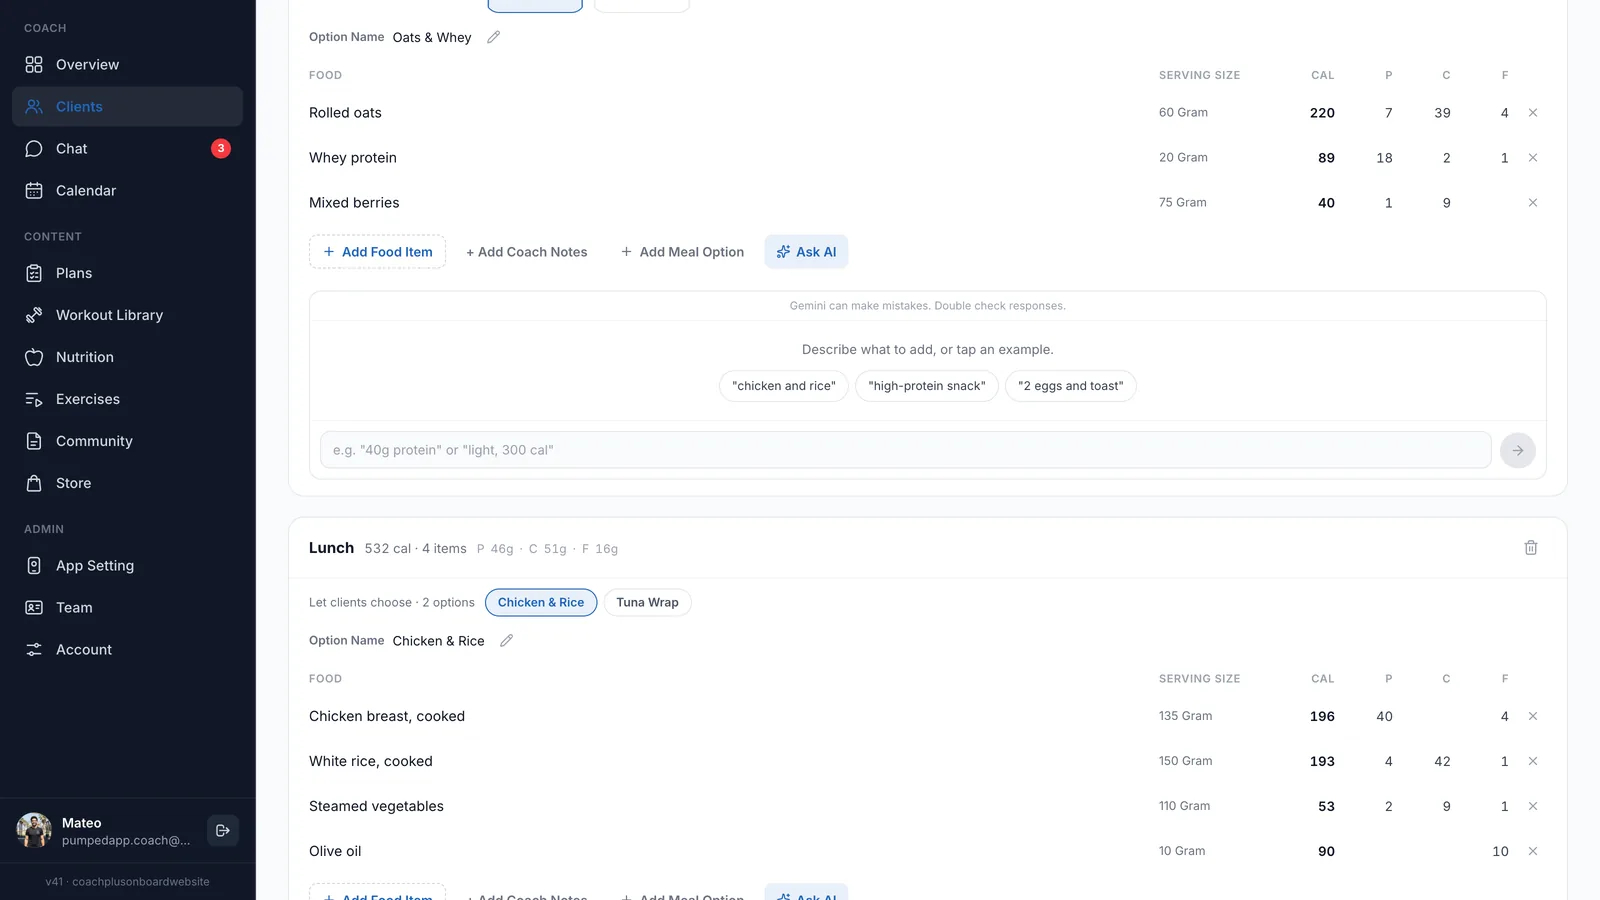
Ask AI
- Click Ask AI on a meal.
- Describe what to add, like "40g protein" or "light, 300 cal", or tap one of the examples.
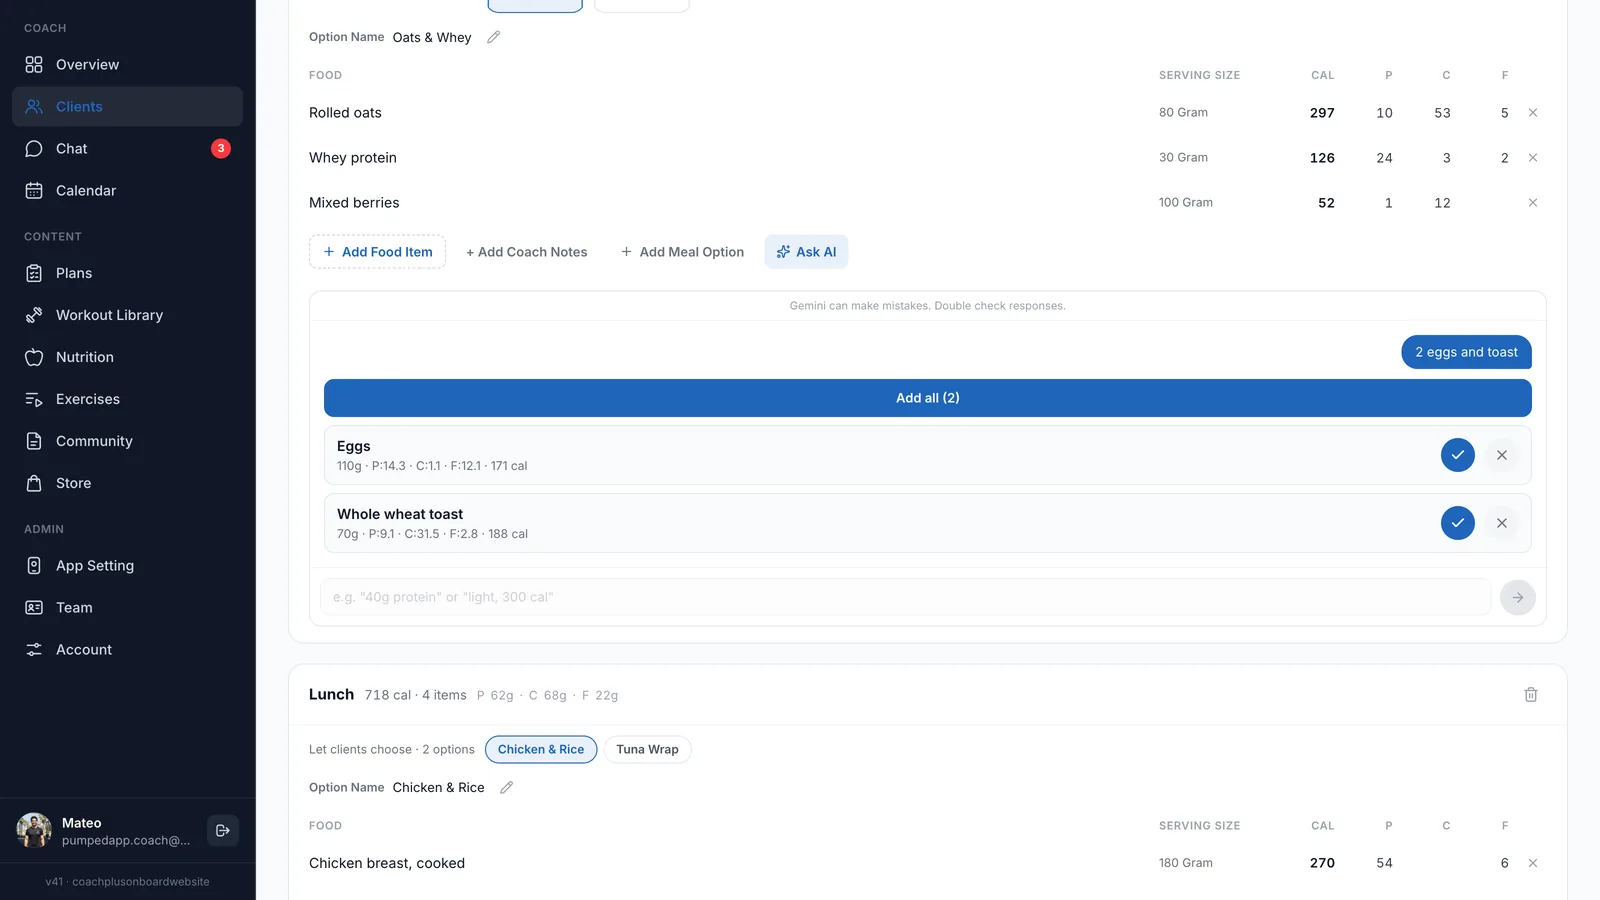
- The AI suggests foods with amounts in grams and their macros.
- Click the check mark to add a food, the X to skip it, or Add all to add them all.
Tip
Save Your Plan
The Save button becomes active when you have unsaved changes. Click it to save the plan. If saving fails, you'll see "Couldn't save the meal plan. Try again."
Troubleshooting
Save shows a "cannot be 0" error
The day's total calories, protein, carbs, or fat is 0 - for example, in a new plan with no foods yet, or a goal set to 0. Add foods to the plan, or enter a goal above 0 under Daily goals.
Can't find a food?
Search matches names in the language selected in the food window. Switch the language, or create a custom food.
Can't see the Meal Plan tab?
The tab only shows for clients you coach, and only if nutrition is included in your plan. If it isn't, Nutrition in the sidebar shows a lock icon. Contact support to upgrade.
What's Next?
- Meal Plan Templates - Start from a ready-made plan
- Managing Client Profiles - Find the Meal Plan tab and other client details
- Client Check-Ins - Follow your client's progress