Every client has a profile page with everything in one place: their program, activity, measurements, photos, meal plan, and your private notes. This guide walks through each part.
Opening a Client Profile
Go to Clients in the sidebar and click any client row. Their profile opens on the Overview tab. To go back to the list, click the Clients link at the top of the profile.
Leads (people who signed up but you don't coach yet) open on the Profile tab, and it's the only tab they have. Once you start coaching them, all the other tabs appear.
The Profile Header
At the top of every profile you'll see:
- The client's photo and name
- A Coached or Lead badge
- Online or Offline, based on whether they're signed in to the app
- Coached since (for clients) or Signed up (for leads), with the date
- Last active: the last time they logged in
For coached clients there's also a Message button. Click it to open the Chat page with that client's conversation.
Profile Tabs
Coached clients have up to seven tabs: Overview, Measurements, Training Volume, Check-in, Program, Meal Plan, and Profile. On small screens the tabs show only their icons.
Info
1. Overview
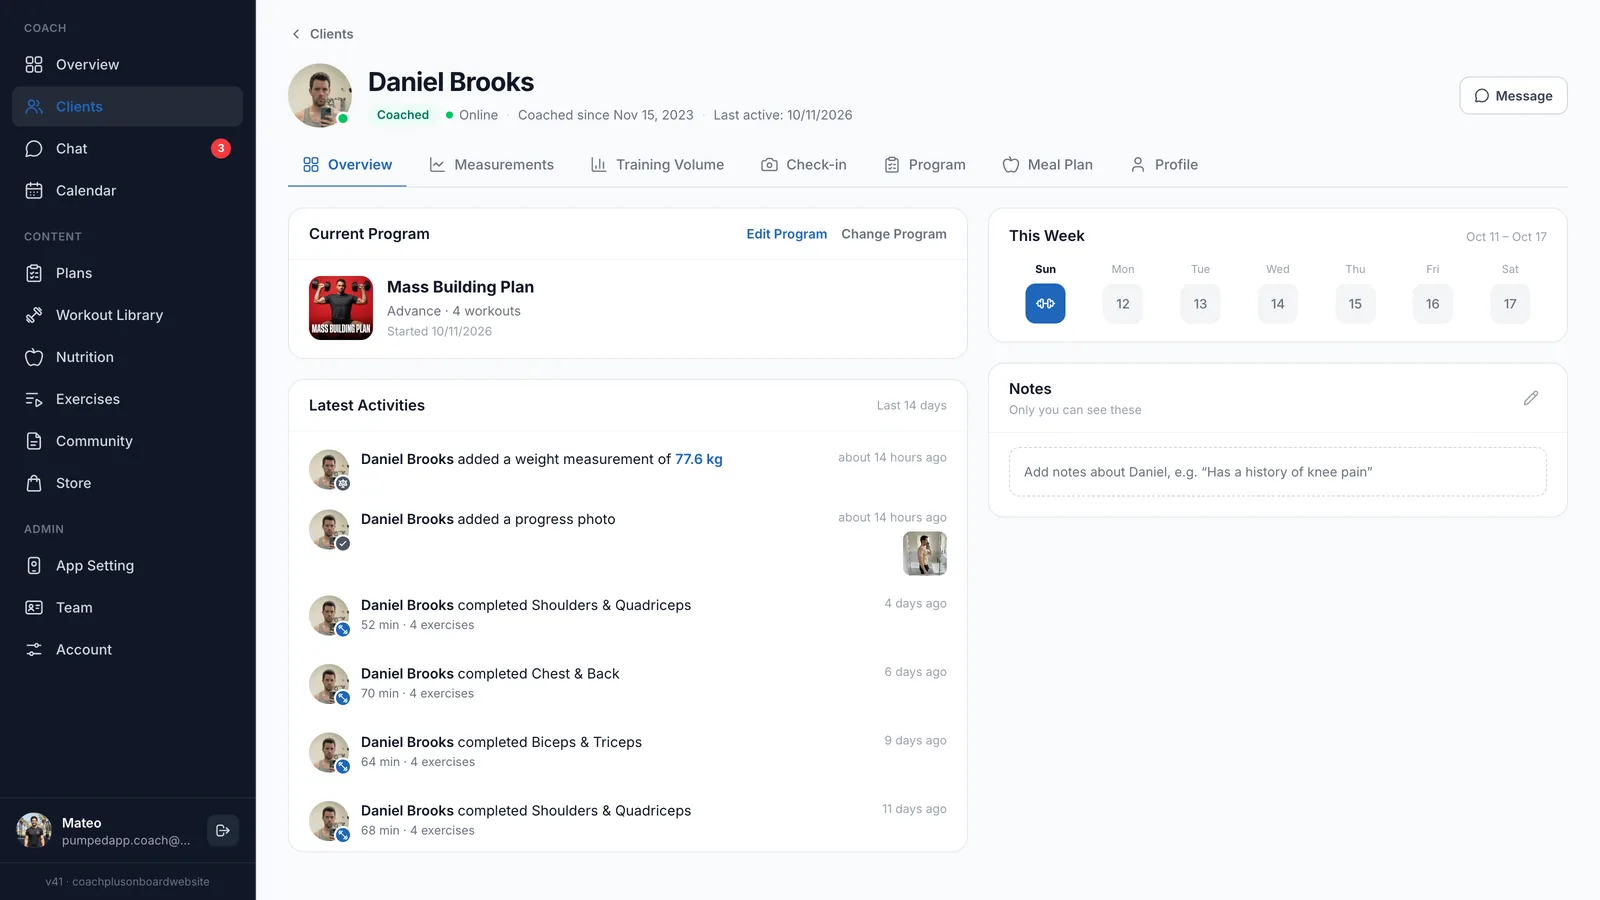
A quick snapshot of how the client is doing:
- Current Program: the client's active program with its level, number of workouts, and start date. Click Edit Program to open it in the editor, or Change Program to pick a different one. If the client has no program yet, click Assign Program.
- Latest Activities: workouts, measurements, and check-ins from the last 14 days. Click a workout to see its details.
- This Week: the current week, Sunday to Saturday, with the days the client was active marked.
- Notes: your private notes about the client ("Only you can see these"). You can read them here, but you edit them on the Profile tab. Click the pencil icon to jump there.
When you choose a program with Change Program or Assign Program, a window opens with your plans. Search for the one you want and click Assign. The client gets their own copy, so editing it later won't change your original plan. If they already have a program, the new one replaces it.
2. Measurements
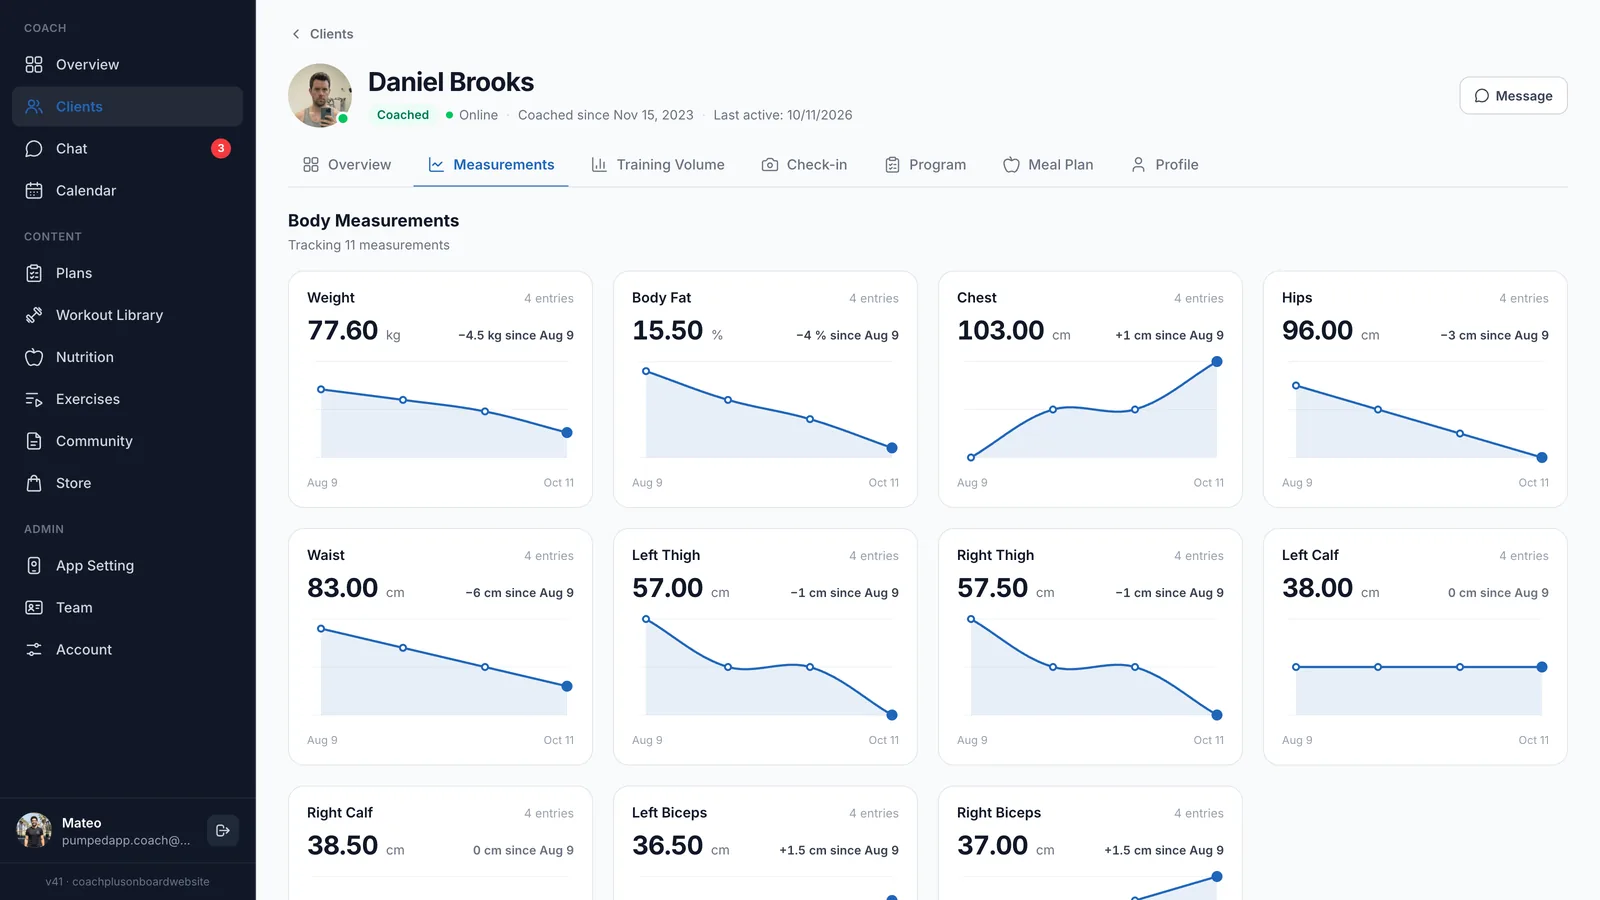
The Body Measurements section shows how many measurement types the client is tracking. Each type (Weight, Body Fat, Waist, and so on) gets its own card with:
- The number of entries
- The latest value
- The change since the client's first entry, with that entry's date
- A chart of every entry, with the first and last dates underneath
Only measurement types that have data are shown. If the client hasn't logged anything yet, you'll see No Measurements Available.
3. Training Volume
Shows how much weight the client lifted for each muscle group in the last 30 days, 90 days, or 6 months. Each muscle group has a bar chart with one bar per workout, plus total and average volume. See Training Volume for the details.
4. Check-in
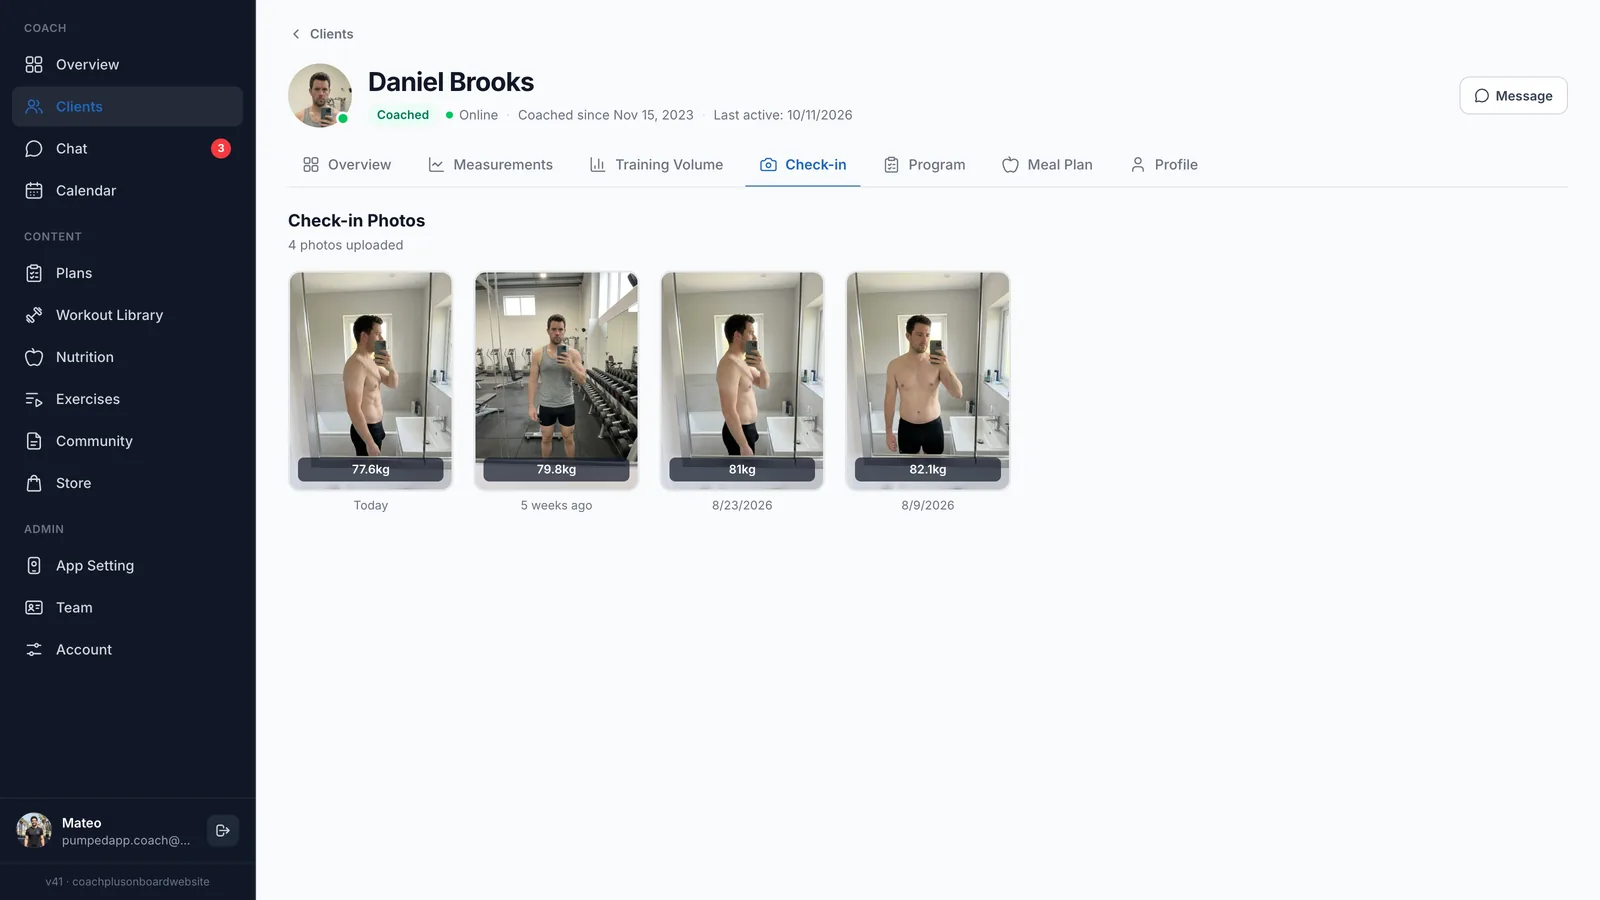
A grid of the progress photos the client uploaded, newest first, with their weight and the date. Click a photo to view it full size and flip through the rest. See Client Check-Ins for more.
5. Program
Manage the client's workout programs and see what they've completed.
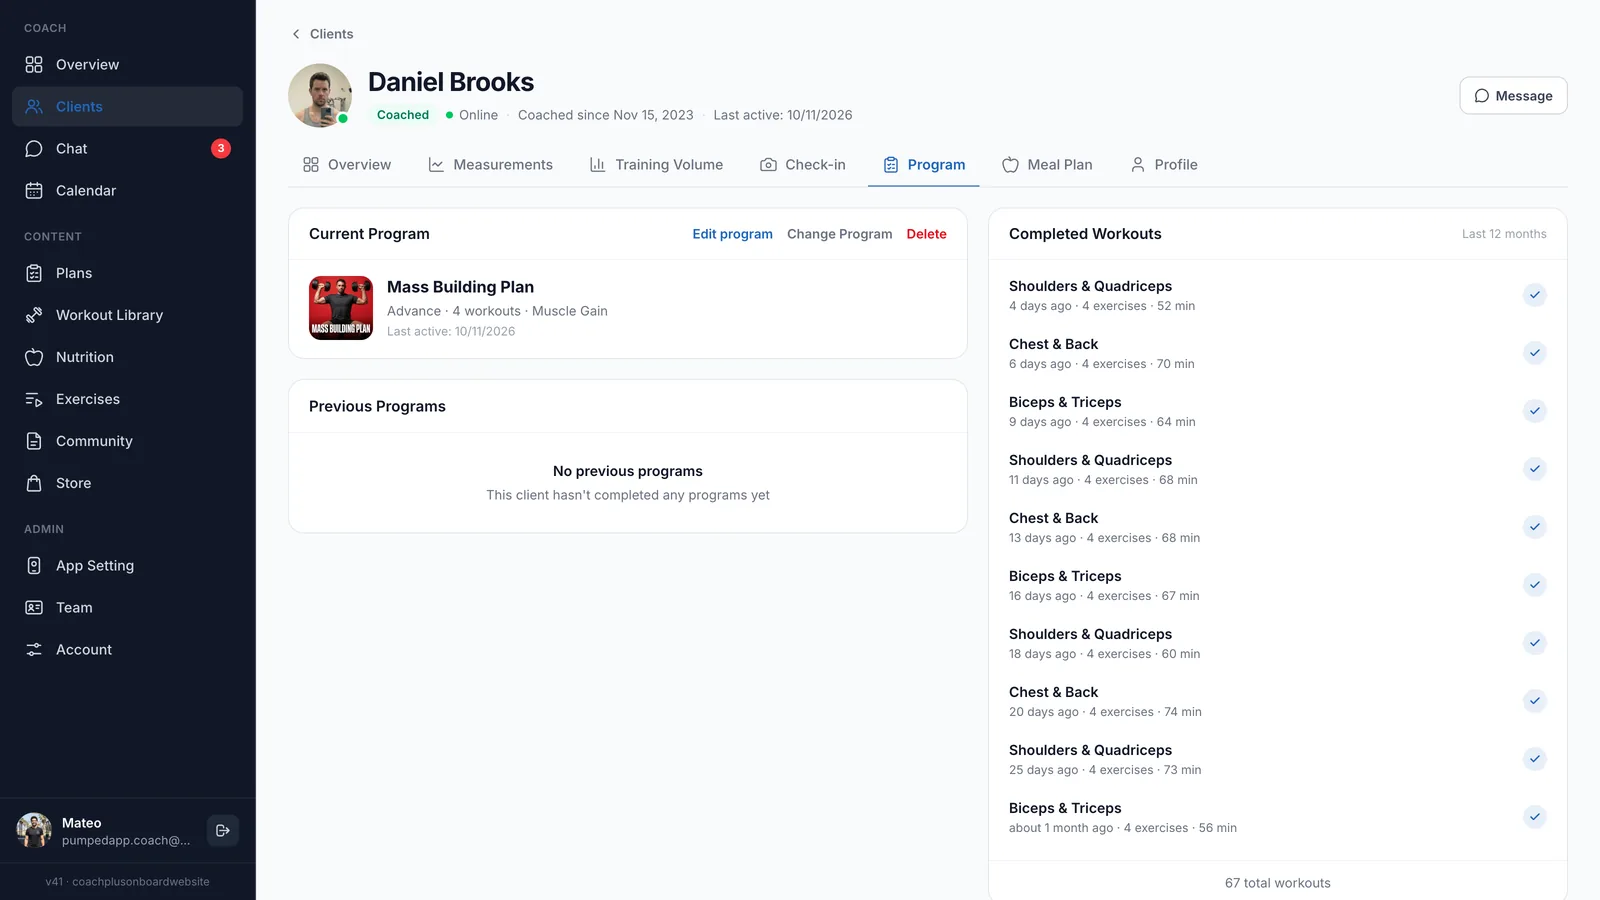
Current Program shows the active program with its level, number of workouts, training goal, and last active date. You have three actions:
- Edit program: opens the program in the editor
- Change Program: replaces it with another of your plans
- Delete: permanently deletes the program and its workouts after you confirm. The client's completed workout history is kept, and they'll have no active program until you assign a new one. This can't be undone.
If the client has no active program, you'll see Assign New Program instead.
Previous Programs lists the programs the client had before, with the level, goal, and last active date. Click Reactivate to make one active again.
Completed Workouts lists every workout the client finished in the last 12 months, across all programs, newest first. Each one shows when it was done, how many exercises it had, and how long it took. Click a workout to see every exercise with its sets, reps, and weight, plus any workout notes. The total count is shown at the bottom.
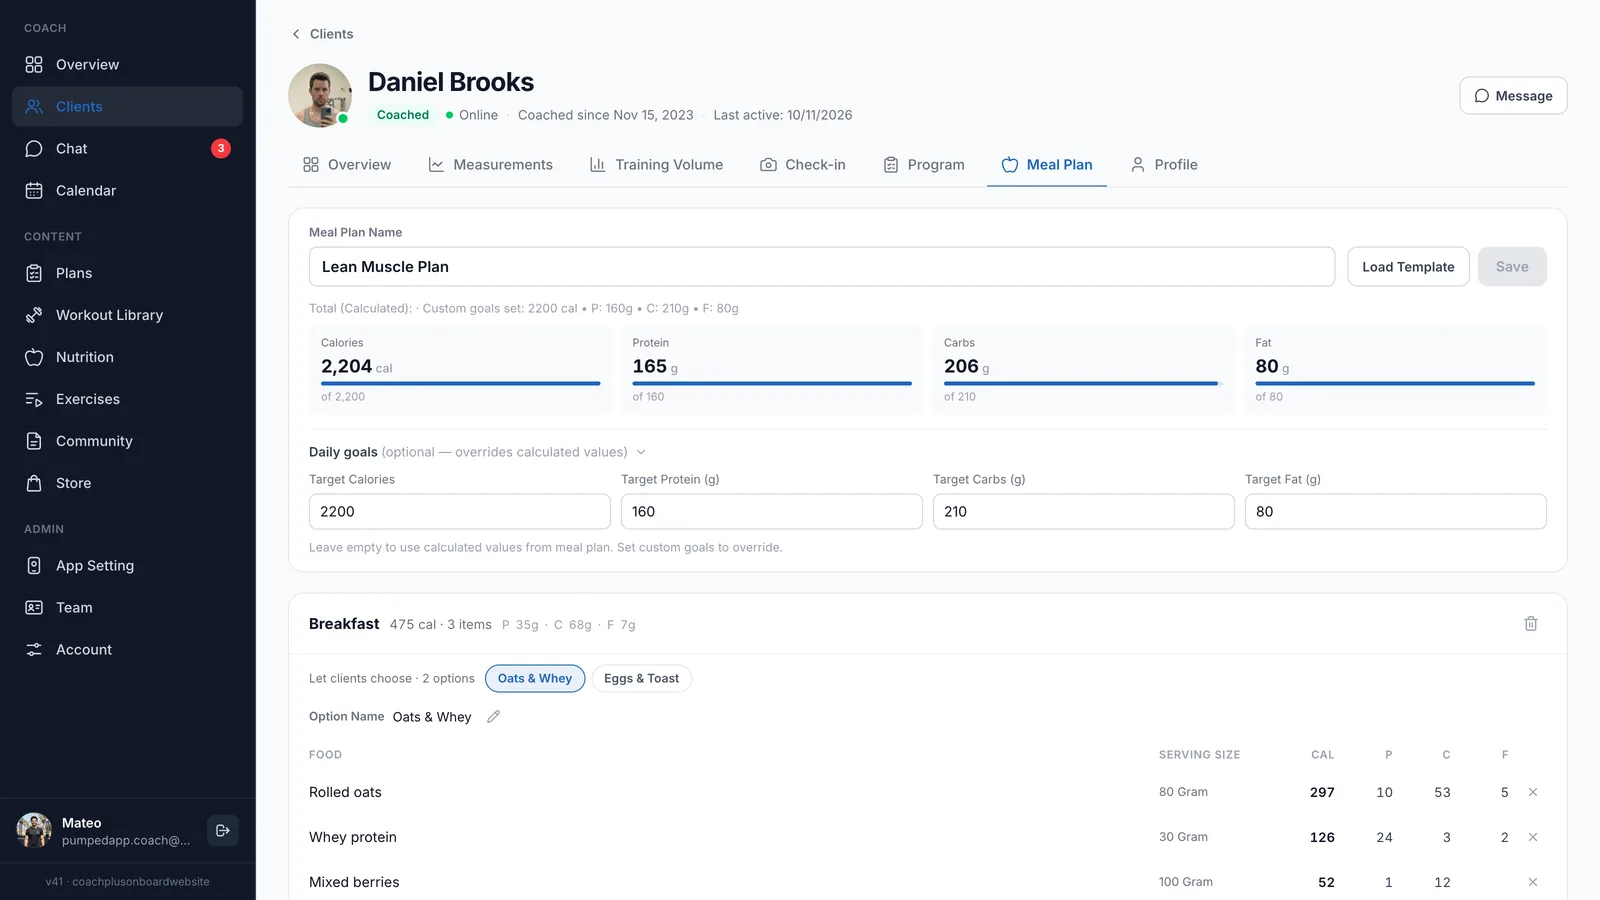
6. Meal Plan
If the client doesn't have a meal plan yet, click Use Template to start from a template, or Start from Scratch.
Once there's a plan, you can:
- Rename it in the Meal Plan Name field
- See the day's totals for calories, protein, carbs, and fat. Open Daily goals to set your own targets. Leave them empty to use the values calculated from the meals.
- Click Add Meal and pick Breakfast, Lunch, Dinner, or Snack
- In each meal, use Add Food Item, + Add Coach Notes, or Ask AI to describe what to add and get food suggestions you can add or dismiss
- Click Add Meal Option to give the client alternatives for the same meal. The meal then shows Let clients choose with the number of options.
- Click Load Template to replace the whole plan with a template (you'll be asked to confirm)
Click Save when you're done. For more, see Custom Meal Plans.
7. Profile
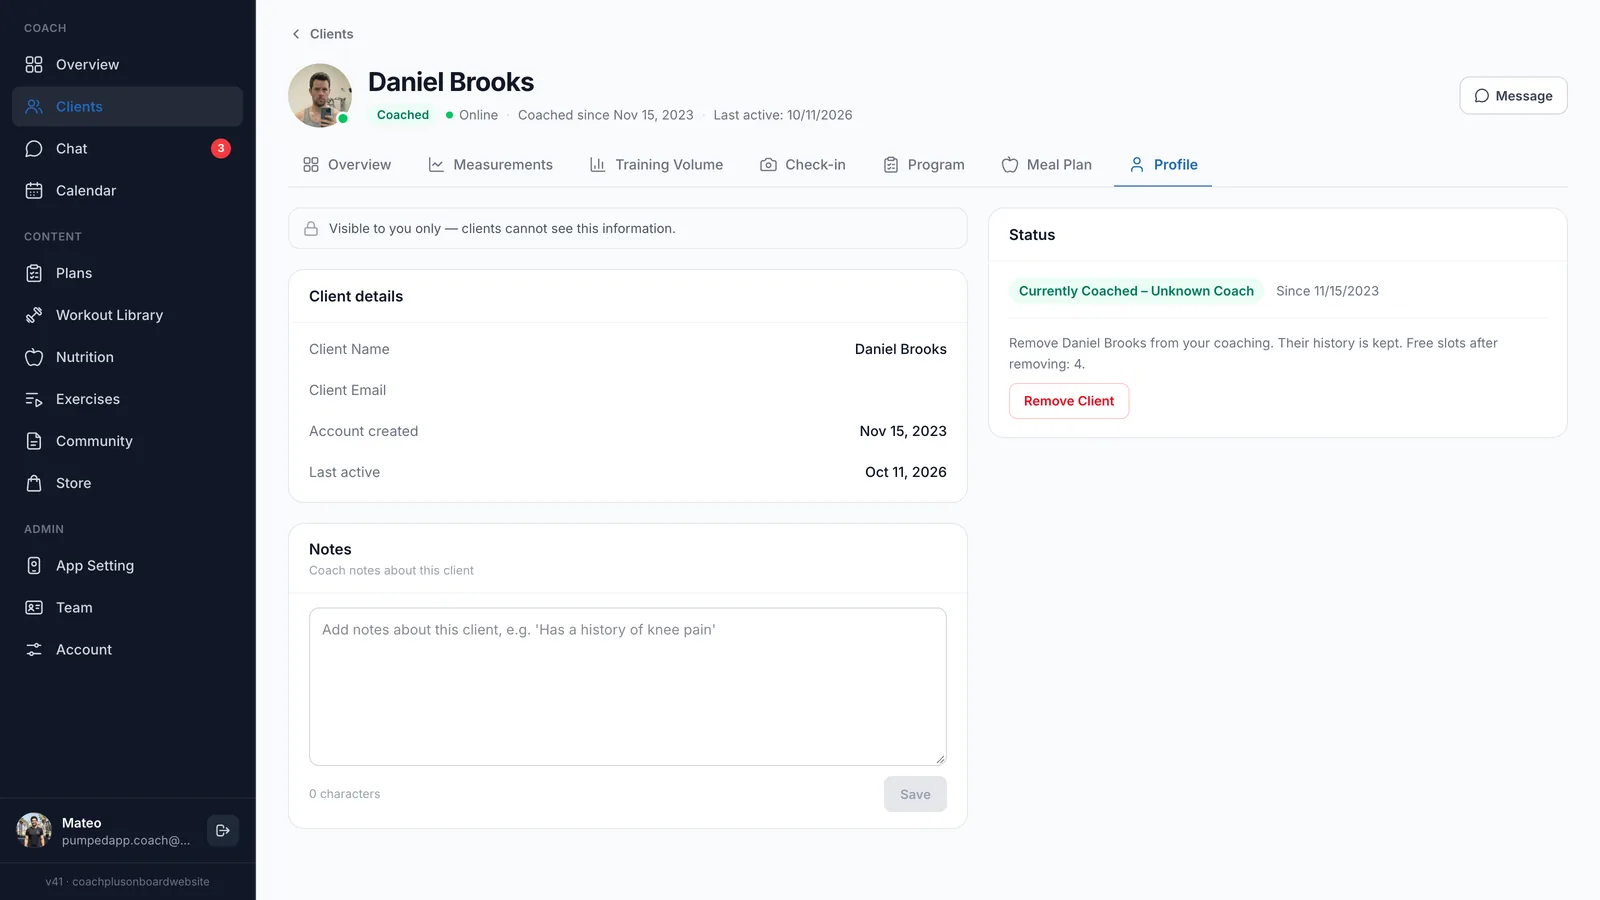
Everything on this tab is visible to you only. Clients can't see it. It has three sections:
- Client details: name, email, account creation date, and last active date
- Notes: your private notes, such as injuries or preferences. A character counter shows the length. Click Save after editing. These are the same notes shown on the Overview tab.
- Status: Currently Coached with the date you started, or Available for a lead
Under Status, click Remove Client to stop coaching someone. Their history is kept and a slot frees up in your coaching capacity. For a lead, click Add Client to start coaching them, which uses one slot. Both actions ask you to confirm first. If you're at your client limit, you'll be asked to upgrade before you can add more.
The Clients Page
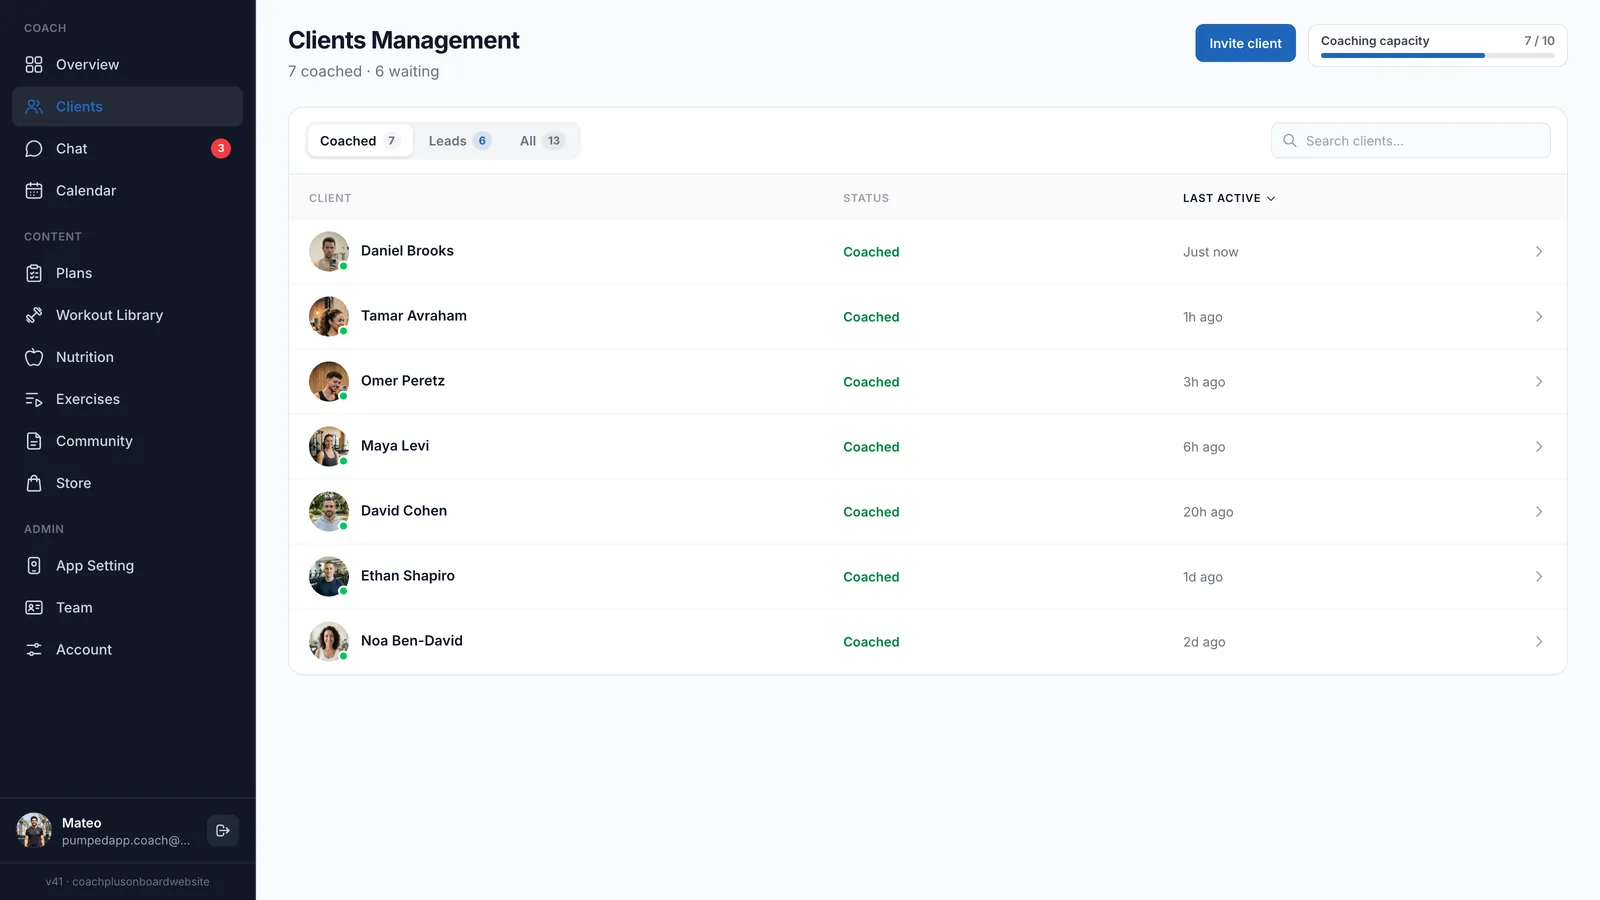
The Clients Management page lists everyone who signed up with your username. The subtitle shows how many you coach and how many leads are waiting.
Tabs
- Coached: clients you coach. This is the tab that opens by default.
- Leads: people who signed up but you don't coach yet
- All: everyone
Each tab shows its count.
Searching
Type in the search box to filter the list by name or email. Results update as you type.
Sorting
On the Coached and All tabs, the columns are Client, Status, and Last Active. Click a column header to sort by it, and click again to reverse the order. By default the list is sorted by Last Active, most recent first.
Leads
The Leads tab shows Lead and Registered columns and a short note explaining what leads are. Click Start coaching on a row to add that person to your clients right away. If you've reached your client limit, the button is disabled and the note tells you to upgrade.
Inviting Clients and Capacity
Click Invite client at the top of the page to get a message you can copy or share on WhatsApp, plus your coach username. Next to it, the Coaching capacity bar shows how many clients you coach out of your limit.
The list shows 10 clients per page. Use the page numbers or the Previous and Next buttons at the bottom to move between pages.
Client Stats on the Overview Page
The dashboard's Overview page has three client cards:
- Active clients: coached clients who logged in within the last 7 days. Click View All to open the Coached tab on the Clients page.
- Inactive clients: coached clients with no login for 7+ days. Click View to open the Coached tab.
- Coaching capacity: how many clients you coach out of your limit (for example, 35/50), and how many slots are still available
Info
What's Next?
- Client Check-Ins - Review progress photos
- Training Volume - Muscle-group volume per workout
- Assigning Plans - Give clients workout programs
- Meal Plan Templates - Quick nutrition planning